Re-Designing the Phonographic Disc Box
by Anastasia Sopchak, Conservation Lab Assistant
Syracuse University Libraries’ Special Collections Research Center (SCRC) and the Belfer Audio Laboratory and Archive are home to an incredibly large collection of Commercial Phonographic Discs. In fact, there are over 530,000 items in this collection, which ranges from the 1890s through the 1990s. The discs themselves come in many different sizes and conditions, but the 10- and 12-inch 78 RPM (revolutions per minute) recordings are the most common. Some of the discs are in great shape, especially considering their age. However, many others have degraded over time or through not-so-gentle handling by those who used them. Some are de-laminating, where the outer coating either becomes brittle and peels away, or the core contracts and expands due to humidity/temperature changes causing the outer coating to crack and peel (see Image 2 & 3). Other discs have shattered into fragments (see Image 10). It was the Conservation Lab’s mission to re-design the container to ensure the safety and maximum longevity of these damaged or degrading discs, while maximizing time and material efficiency.
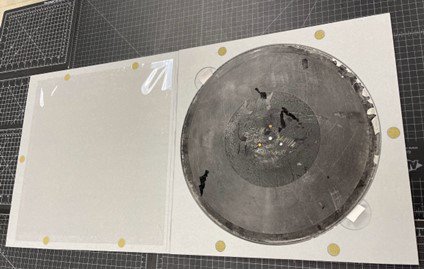
Image 2: A 16-inch lacquer disc, suffering from a brittle outer coating that is flaking off, in its new container.
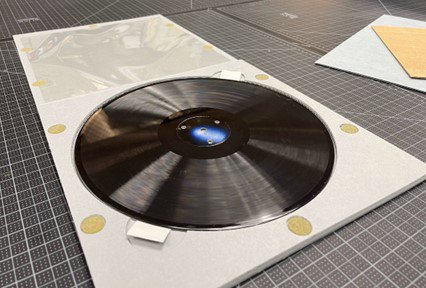
Image 3: A 12-inch disc, suffering from delamination, in its new container.
The Original Box Cutter Design
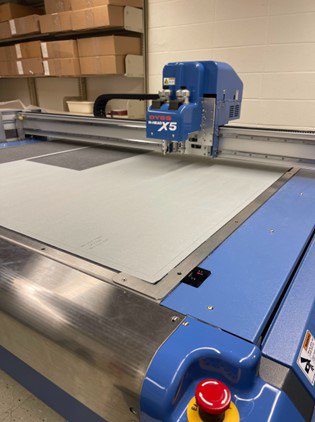
These containers were originally made by hand until the SCRC acquired the DYSS X5 Digital Box Cutter (see top image), allowing us to cut the boxes much faster by machine. This initial box machine design got the job done during a time of urgent need but involved a few minor flaws that we felt we could now go back and eliminate.
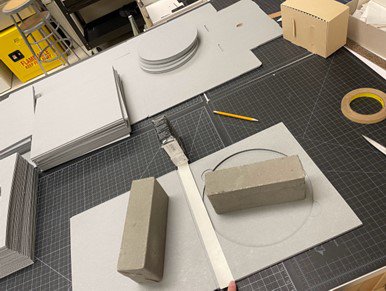
Image 4:Adding the inner framing tape hinge to the old design.
In the original design, we used four design files on the box cutter and cut five components out of archival quality acid-free board that were assembled with double sided tape, self-adhesive framing tape, a mylar protector sheet and ¼ inch nylon string.
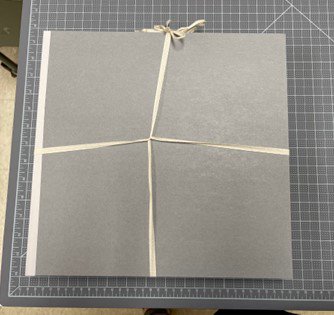
Image 5: The original design, closed. Where the string overlaps in the middle can be a source of pressure on the disc inside.
The assembly took time and many steps, and the final product had a spot where the cord that tied it all shut looped over itself, which could be pressing on the disc inside (see Image 5). Another issue was that the tabs cut by the box machine that allowed us to lift the disc out were cut very inefficiently and caused more wasted material than necessary. Each of these issues were solvable with a little ingenuity and experimentation.
The Redesign of the Phonographic Box
When modifying the existing design, we wanted to keep in mind not only efficiency in material use and assembly time, but also the best way to keep the often broken or delaminating discs held in place safely and securely. The first modification we made was to line up the inner tabs on the sink mat (the inner hole/circle that the disc lays in) and make them half circles. Now, the center circle pieces were no longer wasted material, and could be used as the platform for the discs to rest on. This eliminated the need for one of the four design files we were using to print center circle pieces separately.
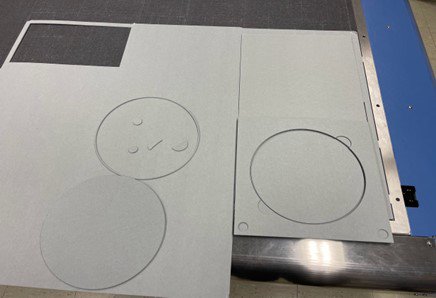
Image 6: Cutting out a prototype for testing on the DYSS X5 Digital Box Cutter machine.
The next challenge was to try and find a way to eliminate the need for the string tying the container shut. We considered adding two holes to the inner sink mat into which we could put Velcro circles to keep the front shut and secure. However, we needed to test this to see whether this method would keep the front shut and not allow room for the disk to slide out should someone mishandle the container and turn it vertically.
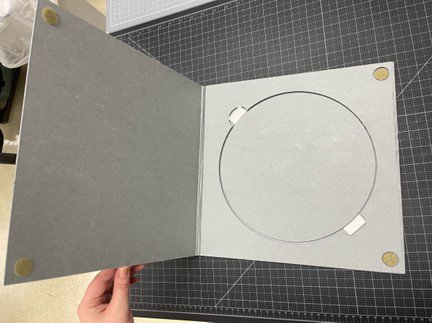
Image 7: The first two Velcro dot version.
Initially, we added the two Velcro holes on the opening edge of the sink mat. However, after testing we found that this was not as secure as we needed it to be. So, we moved the location and added two more, this time on the top and bottom of the sink mat. This was much more effective and provided an extra layer of security should the container be held incorrectly.
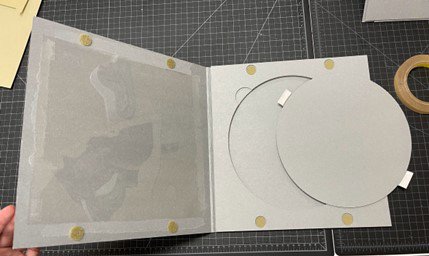
Image 8: The four Velcro dot version.
The final major modification we made was to change the front and back covers from two separate pieces, attached with the framing tape, to one single piece that folded. After three trials testing out different spine folding widths, we were able to cut a single cover which could be folded around the inner sink mat housing, eliminating the need for the framing tape hinge. We also added some written text (which the DYSS X5 Box Cutter will write for us) to the front cover, reminding users of the proper way to handle the boxes and the discs.
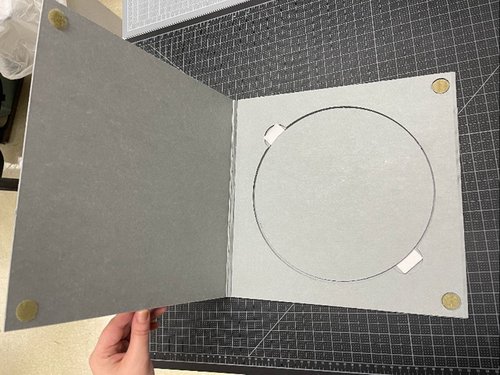
Image 9: The new one-piece folding cover, open.
Our new design was nearly complete. After consulting with Ivayla Roleva-Peneva, the Media Preservation Archivist, we realized we needed to add a fifth Velcro dot on the side where the container is opened. Once this was added to the design, we were finished with testing and making changes. The final step was to apply these same changes and improvements to the 12- and 16-inch designs as well.
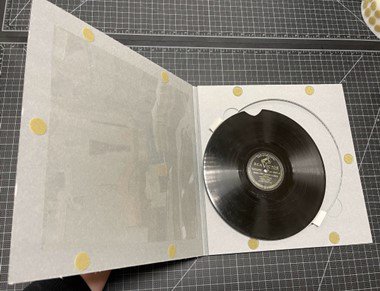
Image 10: The final five Velcro dot design with a broken disc inside.
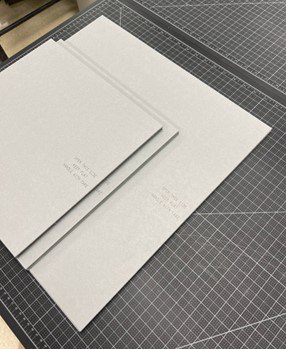
Image 11: The 10-, 12-, and 16-inch re-design test containers stacked.
Recap: Redesign of Phonographic Boxes
In the final design we eliminated the need for the framing tape hinge and the ¼ inch nylon string. The design files were condensed from four files to three, and rather than cutting five components and having to discard two center circles, we can now cut four components and only discard one center circle. We are still using the framing tape to make lifting tabs on the inner circle and a mylar sheet on the inside cover to prevent any abrasion of the disc by the cover. Finally, we added five Velcro dots to secure the cover shut.
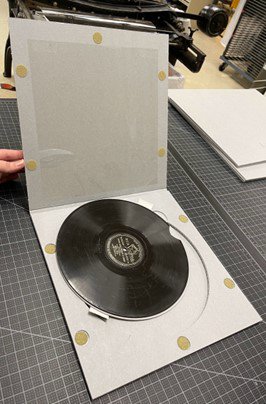
Image 12: The new design, open with a disc.
With fewer components involved in the assembly, we can produce the containers much more quickly. For a collection with so many items, it is unrealistic to make new housing containers for every single one. But with this new, more efficient design we can house more of the at-risk or damaged recordings faster while still maintaining a high level of safety and quality, thus prolonging the discs lifespan in our collection.
Thank you to David Stokoe, the Conservation Librarian, and Ivayla Roleva-Peneva, the Media Preservation Archivist for their guidance in this project.
